Settings
The settings page allows you to manage your account and preferences. Here, you can change your display name, set your battletag, and more.
Profile Customization
Display Name
You can customize your profile by changing your display name using the form. This is the name that is displayed on your profile, in hover cards, and more. To change your display name, enter a new name in the text box and click the "Update profile" button.
Battletag
The battletag is your Overwatch 2 battletag. This is used to identify you in the game. To set your battletag, enter your battletag in the text box and click the "Update profile" button.
Do not include the # and numbers in your battletag. This will result in an error.
Once you have set your battletag, you will be able to see your profile page and relevant stats. For more information on your profile, please see the Profile page.
Due to the nature of the workshop code, your battletag is not guaranteed to be unique. If you have a common battletag, it is possible that you may see stats for other players with the same battletag. We recommend using a unique battletag to avoid this issue.
Title
You can add a title to showcase your achievements via the title selector. The selector will display all titles that you have earned. To add a title, select the title from the selector and click the "Update profile" button.
Avatar
You can upload a custom avatar by clicking your current avatar. This will open a file selector.
After selecting a file, you can crop it and save your changes with the dialog below:

Once you have saved your changes, your avatar will be updated.
Banner
Premium users can upload a custom banner by clicking your current banner. This will open a file selector. After selecting a file, you can crop it and save your changes.
Please note that premium users are the only ones who can upload custom banners. We plan to add preset banners for free and basic tier users in the future.
Accessibility Settings
Colorblind Mode
You are able to choose between 3 preset colorblind modes to aid in the readability of the platform. To change the colorblind mode, select the mode you would like to use and click the "Update profile" button.
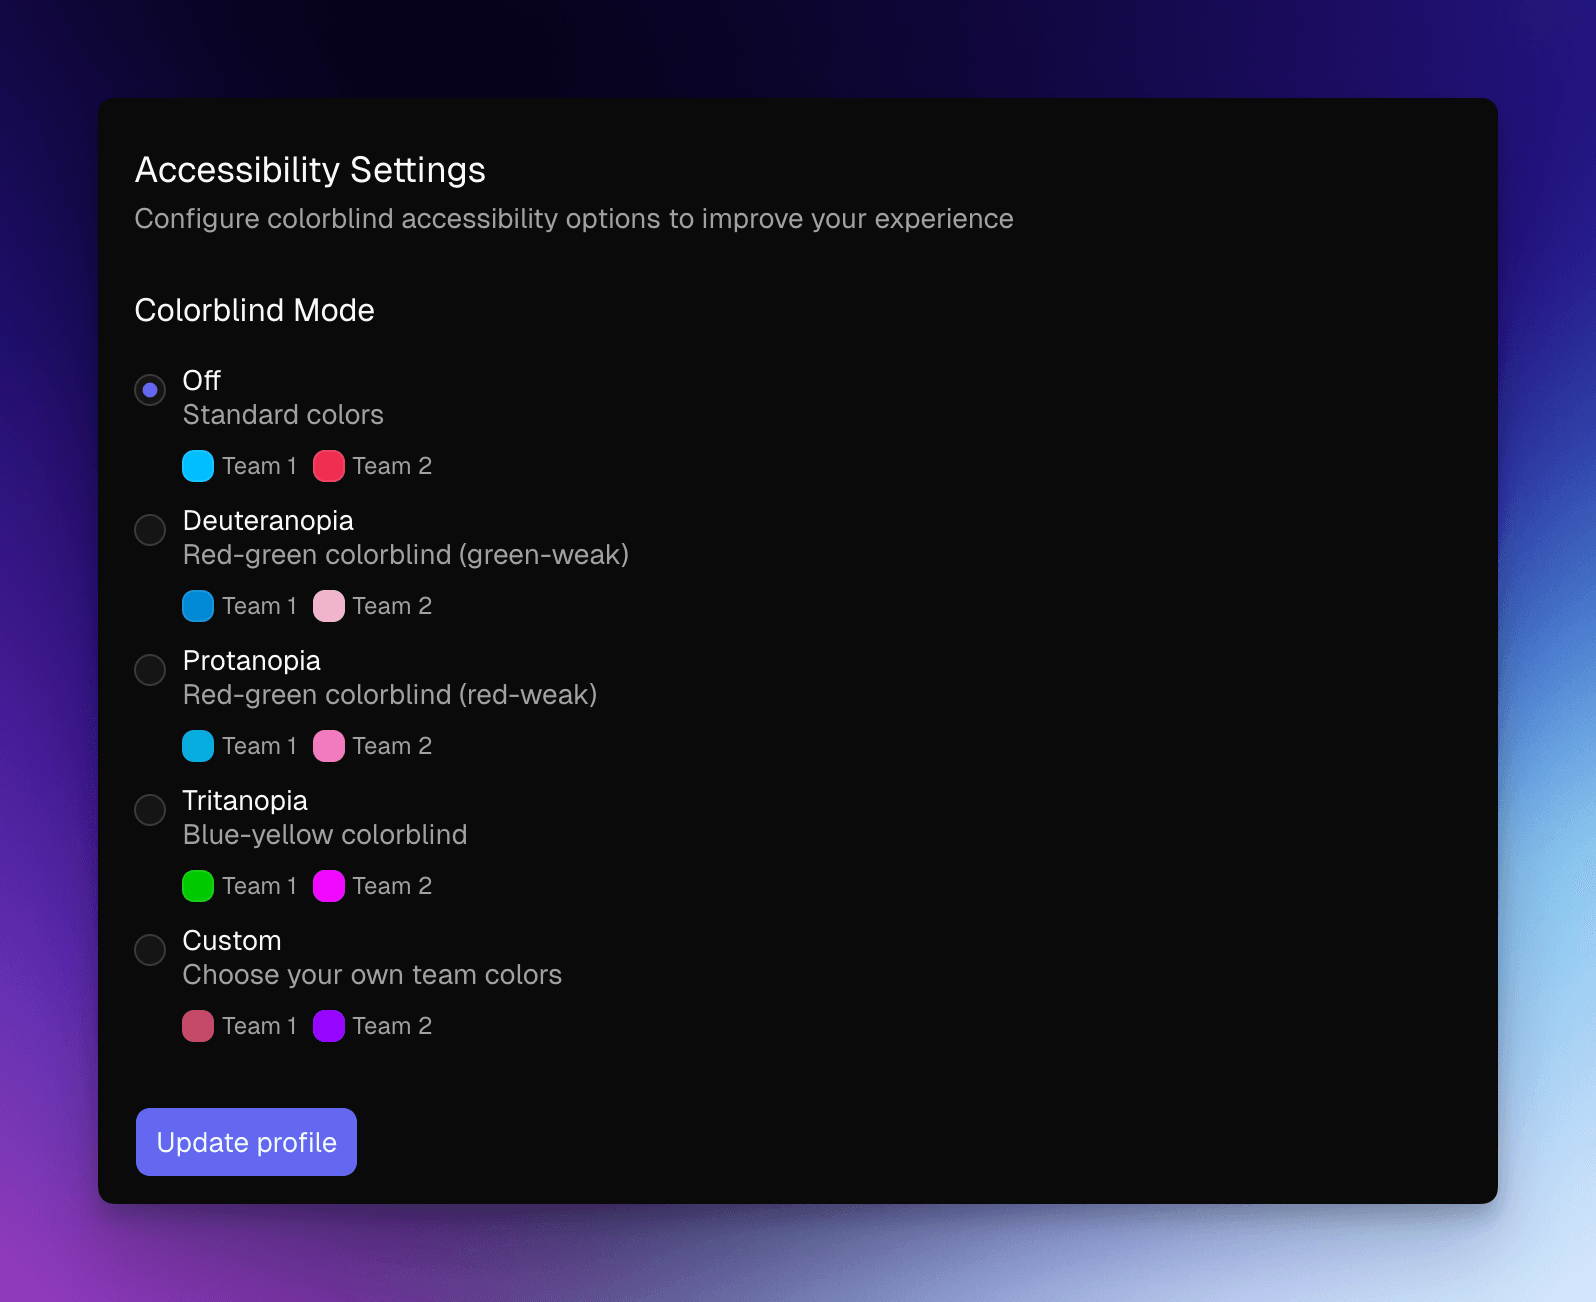
The colorblind modes are:
- Deuteranopia: Simulates color blindness that affects the red-green color channel (green-weak colorblindness).
- Protanopia: Simulates color blindness that affects the red-green color channel (red-weak colorblindness).
- Tritanopia: Simulates color blindness that affects the blue-yellow color channel.
The colors picked for each mode are selected on the colors used in Overwatch 2. The hex codes are pulled directly from the game's user interface. This choice was made to ensure that the colors are consistent and easy to understand for Overwatch 2 players.
Custom Colorblind Mode
You are able to choose your own custom colorblind mode by selecting the "Custom" option. This will open two color pickers for the team 1 and team 2 colors.
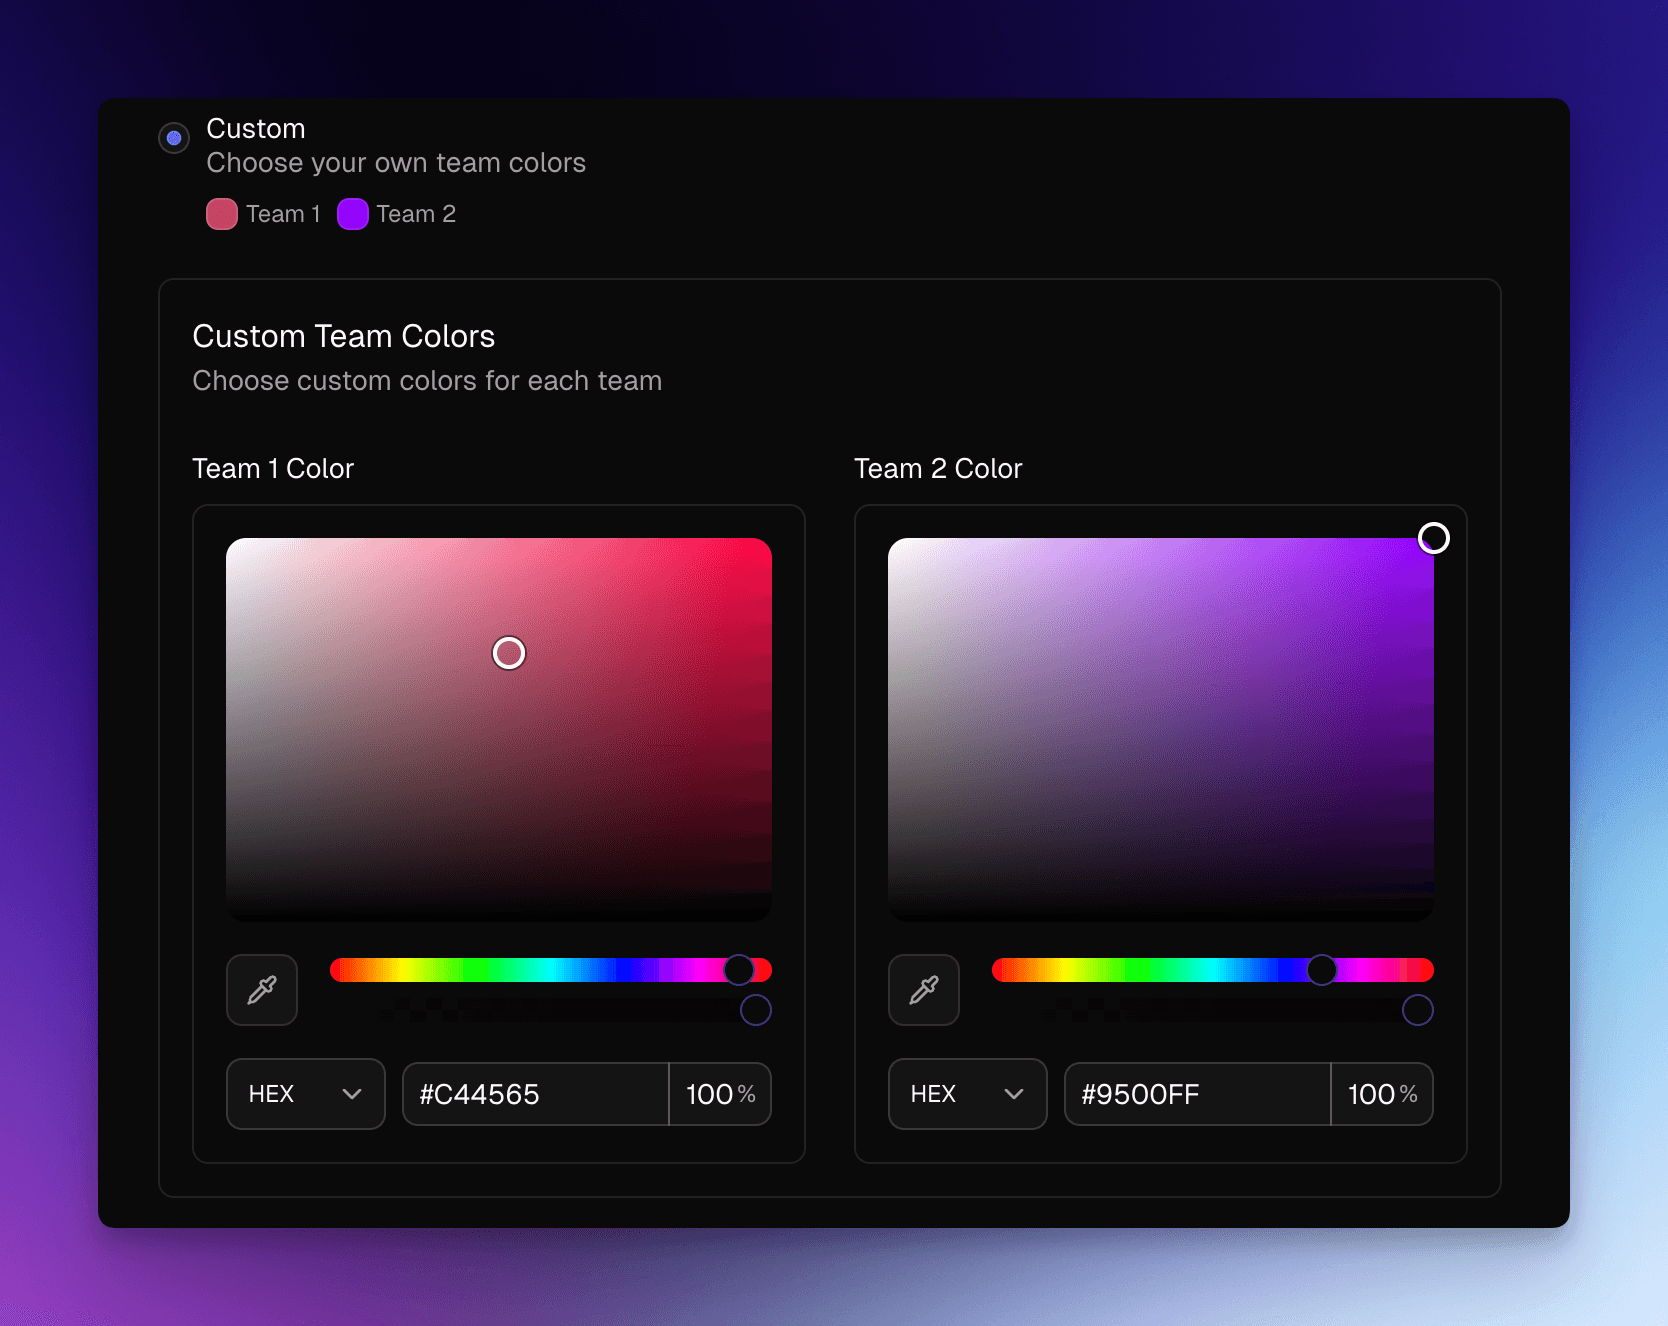
This gives the user full control over the colors that are used in the platform. Pick any color you would like for each team. Once you have selected the colors, click the "Update profile" button to save your changes.
Danger Zone
Delete Account
You are able to delete your account by clicking the "Delete Account" button. This will open a dialog where you can confirm your action.
Once you have confirmed your action, your account will be deleted and you will be logged out.
This action is irreversible. Once your account is deleted, there is no way to recover it.